Desertcart purchases this item on your behalf and handles shipping, customs, and support to KSA.
✨ Transform your floors into a gleaming statement piece 🛠️
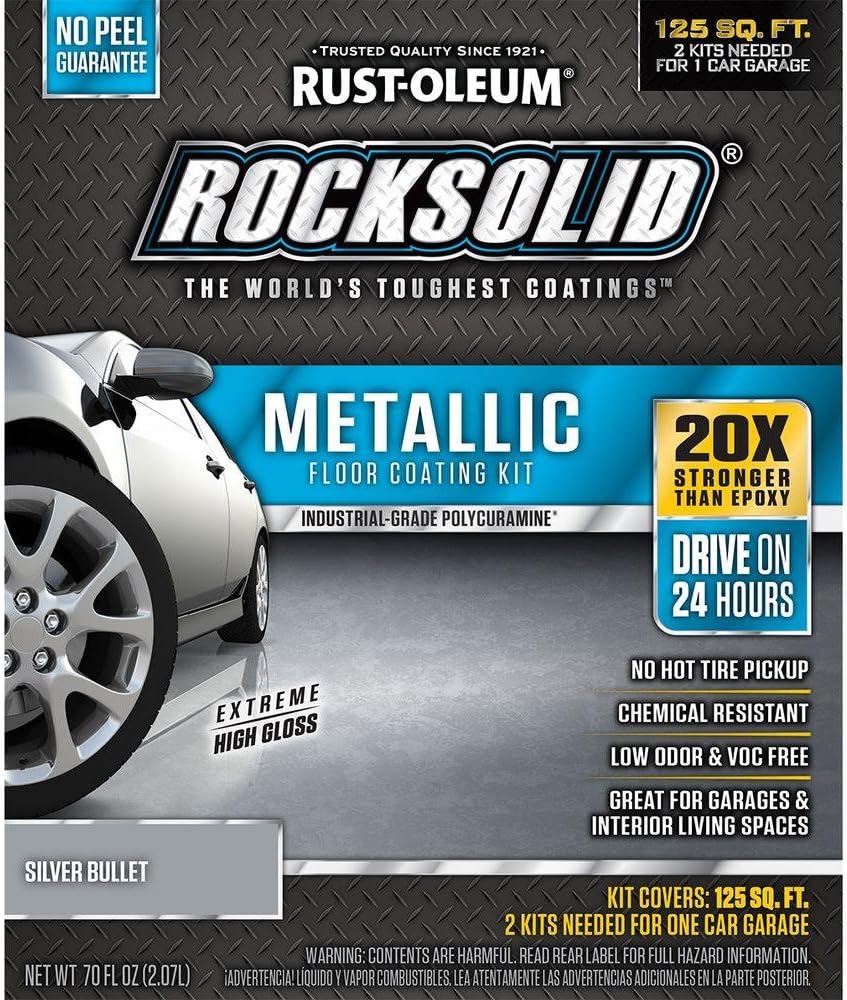
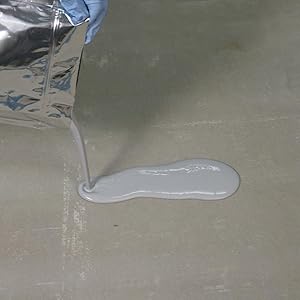
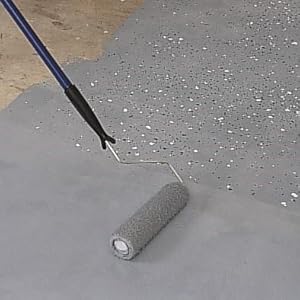
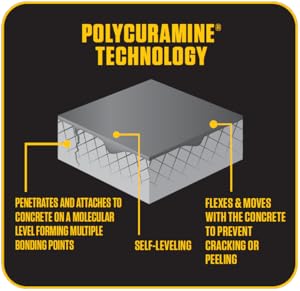
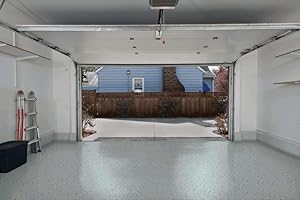
Rust-Oleum 286983 Metallic Floor Coating Kit in Silver Bullet delivers a high-gloss, marbleized metallic finish with industrial-grade polycuramine for superior durability. Designed for high-traffic indoor areas like garages and basements, it offers chemical resistance, waterproof protection, and no hot tire pickup. Low odor and VOC-free, it cures fully in 24 hours and covers up to 125 sq. ft. per kit, making it a fast, stylish upgrade for professional-grade floor protection.


| ASIN | B01GS74M0M |
| Age Range Description | Adult |
| Best Sellers Rank | #100,888 in Tools & Home Improvement ( See Top 100 in Tools & Home Improvement ) #229 in Interior & Exterior House Paint |
| Brand | Rust-Oleum |
| Brand Name | Rust-Oleum |
| Color | Silver Bullet |
| Color Code | Silver |
| Container Type | container |
| Coverage | 100 |
| Customer Reviews | 4.0 out of 5 stars 794 Reviews |
| Dry Time In Hours | 10 |
| Finish Type | Metallic, High Gloss |
| Full Cure Time | 24 hours |
| Global Trade Identification Number | 00020066294410 |
| Included Components | Rust-Oleum 286983 Metallic Floor Coating Kit-Silver Bullet |
| Indoor Outdoor Usage | Indoor |
| Is Waterproof | True |
| Item Form | Liquid |
| Item Type Name | Garage Floor Coating |
| Item Volume | 2661.62 ml |
| Item Weight | 3.2 kg |
| Manufacturer | Rust-Oleum |
| Model Name | Rocksolid Metallic |
| Model Number | 286893 |
| Paint Type | Metallic |
| Part Number | 286893 |
| Size | 70 Fl Oz (Pack of 1) |
| Special Feature | Enhanced Durability, Chemical Resistant |
| Special Features | Enhanced Durability, Chemical Resistant |
| Specific Uses For Product | Interior |
| Surface Recommendation | Floor |
| UPC | 020066294410 |
| Unit Count | 70 Fluid Ounces |
| Warranty Description | Warranty |
| Water Resistance Level | Waterproof |
G**.
Looks Awesome!
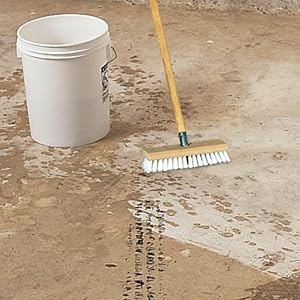
I applied the Rock-Solid Metallic Blue to a small craft room off my garage and it came out fantastic. The room is 80 sq. ft. and I used two kits (100 sq. ft. – 125 sq. ft.). My shopping list – two epoxy kits, GlobMarble roller cover, spiked sandals, squeegee, anti-skid grit, de-greaser, masking tape, plastic drop cloth, sandpaper, chip paint brush, mineral spirits, one gallon paint pail. 1) With a putty knife and sandpaper, I went over the floor and scraped up all the junk I could. I sanded out the rust spots and other discolorations. I didn’t do any filling or leveling. The floor was in pretty good shape. 2) I scrubbed the floor with degreaser and a long-handled scrub brush according to package directions. 3) I used one of the packages of acid etch included in the kit. Followed package instructions, except I didn’t use a watering can. I just dipped the floor brush in the bucket. Dried the floor for a couple of days with a space heater and fan. 4) I masked the walls with about a foot of plastic drop cloth all around the base. I used Frog Tape to make a clean line. It didn’t come out totally clean. I guess Frog Tape only works with latex paint. 5) I mixed up the first Rock-Solid kit using just the stir stick (no power mixing). I didn’t put in the anti-skid grit at this point. With the spiked sandals on, I poured out a line of epoxy along the first wall. Used the paint brush to get into all the corners and edges. Then, I spread the epoxy using the squeegee on a long handle. Then rolled with a long handled roller. (Because of the bad reviews, I didn’t use the roller cover in the kit). One kit covered the 80 sq. ft. fairly well, but there was quite a bit of concrete showing through. 6) Applying the first kit took about 45 minutes, then I immediately mixed up the second kit (still no grit). I went back to the first wall and poured the second coat right on top of the wet first coat. This time the squeegee was scuffing through to the cement, so I just used the roller. The second coat was pooling nicely and spread well with the roller. 7) I went around and pulled the masking tape out of the wet epoxy. Then, I used a saltshaker to apply the non-skip grit to the wet epoxy only in the high traffic areas. It didn’t come out super gritty, but it seems okay. 8) Cleaned up the roller frame and long handles with mineral spirits. Threw away everything else. Went around and touched up the wall paint. 9) It came out great, but there are definitely some blemishes. There are four or five pock marks where sweat off my forehead dropped into the wet epoxy. I rolled over them, but they still left a bubble. Wear a hat or bandanna. Also, when I was removing the masking tape, some sheetrock crumbles got into the epoxy. Some other small debris appeared mysteriously. Maybe it got pulled up out of the crevices. 10) I live in a condo and the neighbors complained about the fumes. Oh well. Otherwise, it was a great improvement!
A**R
Cost effective and easy to use
For the dyi cost effective folks out there. Here is what I did for my 2 car garage that im sure a drunken monkey poured and finished. I had a 2 inch front border with rough edges plus a 4 section pour. I have a 6inch sander I knew my floor had paper, paint, unknown substances from the previous owners. I used my rolling stool to sand the whole thing. Filled in the 4 sections and smoothed the concrete border with the lowes patch kit. The instructions are kind of ok for applying paint after the 1st section it becomes easy to use. Cost below $8 3inch paint brushes $19 for 40grit sandpaper 2 25packs $20 epoxy floor shoes $20 push broom replacement head for cleaning and etching $20 purple power 2.5gallon at Walmart $650 for 5 kits of blue metallic $82 concrete patch at Lowes $35 extended paint roller arm $20 floor squeege $5 bucket for etching My total $879
L**S
It works
In general, I like the product. However, the boxes we ordered from Amazon didn't quite match the boxes we got from a local home improvement store, so there is a noticeable seam/ color change through our floor. Not sure if it had to do from the heat from shipping or something else (I know different batches can have variations. This was actually the thickness of the epoxy-- the Amazon one was more watery and you can see the concrete floor through it). We had to put it on much thicker to at least get the color close to matching, so it covered far less square footage than it should have.
M**A
Doesn’t cover nearly as much as advertised
This doesn’t cover nearly as much as they said, I was able to get MAYBE 30 square feet out of it. I was going to cover 1200 square feet with hopefully ten boxes but at this rate I’d need at least 30. Glad I tested it first. I will add that I read the instructions very carefully before and during applying it. It’s also a lot less opaque than advertised. And lastly, it most certainly is NOT low odor. I’m very disappointed with this product, but they don’t even provide refunds - of course I understand they will not do returns (not that I could because I opened and used it) because it is a flammable material, but I’m going to have to cover over this because it came out so badly, and I’m out $132!!! I will say that the instructions were thorough, but certainly didn’t provide me the product I expected. It was VERY thin liquid, like thinned out paint, definitely not as thick as I thought it would be. Definitely get something cheaper if you can, this product is not worth the price.
A**A
Fantastic Product that Produces Excellent Results After 2 + Years
I was nervous about using this product based on some of the reviews and some YouTube videos. We have a cottage with concrete floors that sweat in the summer, which makes putting down flooring a nightmare. I wanted an epoxy type floor throughout the place, so we started with the kitchen. We ripped out 3 layers of existing linoleum and used power tools with scapers to get the big chunks up and even things out. We used a concrete etch and cleaner and thoroughly cleaned the floor and rinsed it. We didn't fill the few cracks, figuring it would bring some character to the floor. We let things dry overnight and then applied this product, in the cherry bomb shade. We added grit to the mix to keep itnfrim getting too slick, which was effective. I would recommend ordering 2xs the amount the package says it will.cover. Following the directions will end up with a thinner more translucent finished product while laying it in thicker makes it appear more marble and bowling ball like. We did not have problems with bubbles or oddities in the finished product. It is stout and thus far no chipping or peeling. It goes on super easy and perfect application is not needed. The product self-leveled over time and appeared balanced. The product itself does not have a strong odor. People complained about the smell but I couldn't figure out what they meant by it. Gasoline fumes and spray paint ate strong odors - not this. I'll report back immediately if there are any issues. Update- we are heading into our 3rd year with this on the kitchen floor and have ZERO issues. This product is wonderful. The floors sweat in summer, freeze over the winter, and have yet to show any cracks or issues. Highly recommend. Update: Headed into year 5 - zero issues.
A**R
Twice the product required
Verdict still out...... I don't know what to make of this product. Applied correctly (not per Rust-Oleum's written instructions), I think this could be a great product. UPDATE: After numerous calls with Rust-Oleum, a lot of sanding and 17 kits later for a 550 sq ft basement, here is what I have learned: 1. For new concrete or underlay, you must wait at least 28 days for the concrete to cure before applying product. 2. Underlay is very porous and will absorb a lot of the first coat, there is no need to etch this surface if the underlay is new. 3. Expect to put two coats of product on, so buy twice as much product as your space requires per the coverage on the kit. For example, for a 250 sq ft room, get 5 kits (100 sq ft x 5 = 500 sq ft). 4. The new formula has the tint included in the bag, so there is no need to mix with a drill. If you happen to have one of the old versions of the kit that you have to add to the mix just before pouring, avoid using a drill to mix it as it adds air to the product and will result in serious bubbling of the product after drying. Use the stir stick to manually mix it, it beats having to sand the whole floor down and apply a second coat. 5. Apply a thin layer at first, and go back a day or two later to apply a second thin layer. A layer that is too thick will result in bubbles. One layer looks like crap and looks nothing like what is advertised. The second layer will look great. You have 30 days for the product to cure entirely before you can't apply a "rescue coat" after a failed attempt. 6. Do not shake the bag vigorously, it will result in bubbles forming as the product dries. Be patient with each bag and mix thoroughly by laying the bag flat on the ground and kneeding it like you are making bread for 2-3 minutes. 7. Ideally having three people applying would be great; one mixing/kneeding, one pouring and one rolling. If it's just you, don't rush it, you have plenty of time to mix bags better applications if using multiple kits. 8. Pour the bag in small sections and use the box to hold the bag as you spread, do not try to pour the whole bag at once. 9. If bubbles appear after dryjng, let it dry for 2-3 days and sand down with 60 grit sand paper using an orbital sander. The product cannot be used as a filler, so make sure to sand away to a smooth surface. i.e. no craters, you'll know what I mean when you start sanding. 10. Do not wash the surface down with water within the first 30 days, it makes the product turn cloudy. Rust-Oleum suggests vacuuming the surface and washing with a solvent based cleaner like acetone after sanding, if sanding is required because of bubbles. 11. The silver bullet color is a lot darker than you would expect.I was hoping. I'm definitely on the fence as to how I feel about this product. I really wanted something different compared to the bland gray colors that you typically see in a basement, but I'm sort of regretting the $$$$ I spent on 11 kits of this product, the time I spent sanding and the 6 additional kits Rust-Oleum sent me to remedy the situation. To be fair, Rust-Oleum customer service were very helpful and patient, and helped me fill a warranty claim to get additional kits for free, and provided additional information each time I called to make sure I finished the job to my satisfaction. I did call every day while I waited for the claim to go through, and each time I got an additional nugget of information about the product. This is actually a great product, but Rust-Oleum really should make a detailed instructional video with all this detail, and for various types of concrete surfaces; new, old, underlay, etc.
K**N
Gunmetal Grey-189 sq ft (one car garage)
Gunmetal Grey: watch YouTube videos on how to use this product. It makes it MUCH easier. I didn’t have to scrape the old paint off with acid OR sanding. As long as it’s level and no paint is chipping you’re ok. CLEAN! I scrubbed my floor twice to make sure nothing came up and no residue was left make sure it is dry throughout the area. DONOT use a liquid concrete sealer it won’t bond to the epoxy it will bubble of its any larger than patching a hole the size of a quarter. Go grab a tub of cement patching either Home Depot/Lowe’s/even order on Amazon. Much easier to use with a small pudy knife to patch the small holes. You have a bit longer than 40min before it gets hard to manage but you can still double back if need be to patch up. Apply generously as you should have double the kits required for an any area. My one car garage is 189sq ft and (2) one car garage kits were plenty (some colors offer different sizes) use one package at a time and definitely use a foam roller if not a squeegee. Toss out the roller that comes with the kit, it leaves lint. This epoxy product has a consistency like maple syrup and will NOT fill in holes like some may say. Prep work is everything!
D**.
Great product, buy more and focus on prep work
Excellent product, durable, looks great. The amaretto metallic color looks much more coppery (in a good way) than I expected. The product came recommended from a friend and online forums. My buddy’s has lasted 4 years so far and still looks great with no sign of wear and tear or fading. Their experience matches my own. Budget for 80-85 sq ft per kit, otherwise you risk thin coverage. I tried a squeegee but found it would not apply even coats. Went with the supplied roller and it worked great. (Note, remove the lint from the roller beforehand by wrapping and unwrapping it with painter’s tape). Take your time with the prep and having a pair of spike platform shoes on hand in case you need to add a bit in spots while it is settling is crucial. Very happy with it and I have friends wanting to pay me to do the same to their shop floors.
K**I
Garbage waist of money
Scratches easy, bad coverage, chips when anything is dropped on it had bubbles in it and water marks it. Stuff is way too expensive for how terrible it is. Do not waist your money
N**N
dommage le prix était compétitif
L'article est arrivé défectueux les sacs contenant le produit étaient perforés cependant, aucun problème pour le remboursement j'ai du me procurer le produit chez un autre fournisseur
S**E
Séchage
Attendre au moins 4-5 jours avant de faire circuler un véhicule sur l’epoxy
Trustpilot
2 weeks ago
2 weeks ago