

Buy anything from 5,000+ international stores. One checkout price. No surprise fees. Join 2M+ shoppers on Desertcart.
Desertcart purchases this item on your behalf and handles shipping, customs, and support to KSA.
🛠️ Fix floors like a pro—quiet, clean, and quick!
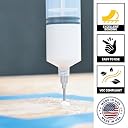
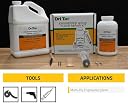
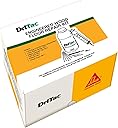
The DriTac Wood Floor Repair Kit (32oz) is a high-viscosity adhesive solution designed exclusively for engineered wood floors. It fills gaps causing squeaks by bonding the floor to the subfloor through small, discreet drilled holes. The kit includes all necessary tools for a professional-grade repair without the need for clamping or wait time, and it’s certified VOC-free for a safer indoor environment.


| ASIN | B001OKA1LS |
| Best Sellers Rank | #471,235 in Tools & Home Improvement ( See Top 100 in Tools & Home Improvement ) #204 in Flooring Adhesives & Mortars |
| Brand | Dritac |
| Brand Name | Dritac |
| Color | White |
| Compatible Material | Concrete, Wood |
| Container Type | Bottle |
| Customer Reviews | 4.1 out of 5 stars 482 Reviews |
| Included Components | Repair Kit |
| Item Form | Liquid |
| Item Package Quantity | 1 |
| Item Weight | 32 Ounces |
| Manufacturer | DriTac Adhesive Group, Basic Adhesive Inc |
| Material | Engineered Wood |
| Material Type | Engineered Wood |
| Model | AX-AY-ABHI-22238 |
| Other Special Features of the Product | Engineered flooring specific application, quick and convenient process, and adhesive void correction for engineered wood floors |
| Part Number | RS-1 |
| Special Feature | Engineered flooring specific application, quick and convenient process, and adhesive void correction for engineered wood floors Special Feature Engineered flooring specific application, quick and convenient process, and adhesive void correction for engineered wood floors See more |
| Specific Uses For Product | Floor |
| UPC | 714241300026 033886173988 |
| Unit Count | 32.0 Fluid Ounces |
| Viscosity Level | High |
| Volume | 32 Fluid Ounces |
| Water Resistance Level | Not Water Resistant |
E**L
Oh my God, does this stuff work as advertised or what!!!! But you will need more than you think. Here are some tips
I purchased this kit for my engineered floor which were glued on a concrete surface. Over the years, I had many hollow spots. Some made a creaking noise when I stepped, some were just annoying because we could feel the air pocket under our feet when we stepped on it. It just felt different. If you are reading about this product and this review, you know exactly what I am describing. So here is a review and some tips Tips - Most importantly, you should know that this product works, and it works excellent. I am not sure technically how it works, bit it feels like it is a glue that also expands with time to fully fill the gap. In the end, there is no difference between the spots that I fixed and the original floors that never had a problem. - I used the kit knowing that it probably would not be enough just to experiment. When I knew it worked, I bought the gallon version. In my experience, I syringe full (50ml or 1.6 oz.) is enough to fill one spot (let's say one spot is a 6inch x 6 inch area) Most of my areas were larger so I went in multiple of that to figure out how much I needed. In the end, I ended up using this kit + 1 full gallon - For every 6" x 6" area I had, I drilled one hole. If my area was double, I drilled 2 holes (1 on each side of the area of the area I wanted to cover). If it was triple, I drilled 3 holes to inject the glue. - In the instructions for multiple holes, it says to pump until you see the glue come on the other hand. In my experience, this never happened. Maybe I under-injected, but I achieved perfect results by sticking to the 6" x 6" area = 1 syringe-full equation - The stuff is super thick. As other users described, I coated inside the syringe with a thin layer of Vaseline. Day and Night difference. I would highly recommend that. Occasionally reapply as you see the resistance increase. I recoated about every 10 syringe-fulls - The manual describes not putting any weight on it and let the glue settle on its own. It sounded counterintuitive but I followed the direction and left it alone. Sure enough, it worked well. Thinking back, I think not putting weight is also important because this is a self leveling product. I think it is important to let gravity to the work on this super-dense glue. I have read others put weight after the glue, and they reported good results too. I personally left it alone for 24 hours, and achieved A+ results - The stuff is messy. No matter how many videos I watched, how many reviews I read, I could not avoid the mess. Even though I did it two times (first time with the kit to test, second time with a full gallon) it was messy both times. Keep wet and dry towels with you all the time as you are working. Gloves help too. - Don't worry if you spill. If you act in the first 10 minutes, it comes off easily off the floor, countertops, sink, hands. I have first hand experience in spilling it to all (and I am a neat guy when it comes to this. That is how messy this stuff is) - Drill all your holes first, then start working with the glue and the syringe. This is related to the previous comments. Once you start using the glue, because it is messy, you are not going to want to switch hands, tools, gloves etc.. - Watch a quick video to see how they cover the holes in the end. That helped me and yielded good results. - The stuff is expensive. OK yes it stings a little, but the fact that it works makes it worth every penny. - Good luck
J**Y
Messy, but it works really well. I've included a few tips.
I had several noisy spots in one area of my bedroom floor. It is engineered wood on top of a concrete slab. I used my knuckles, tapping to see where, and how extensive the problem was. I called a flooring company. They wanted to replace the entire floor. That would be many thousands of dollars. I called two handy-man ads. They never showed up. I had no other choices, and the job made me nervous. Finally, I took a chance on the DriTac Wood Floor Repair Kit. The tips in other reviews were a big help, and I want to thank those people for being so helpful. I did do some things differently though. As another reviewer recommended, before starting, I used Vaseline to lubricate the plunger. I don't know if it helped, but it certainly didn't hurt. 1. I drilled all the holes for each repair at once. There were eleven holes. 2. I used parchment paper to try to minimize the mess. It helped a lot. I could put down the bottle, hypo, and other tools on sheets around the work area. The paper caught a lot of drips and spills. 3. I took the plunger out of the hypo, and placed the rest of the hypo standing up with the needle in the hole. I then poured the adhesive into the hypo while a sheet of parchment paper with a slit in it for the needle caught any mess while pouring. That worked well. 4. I discovered that the needle was pressing and sealing against the slab, preventing injecting the adhesive. I pulled up slightly and that allowed injecting. But that was sometimes messy, as it was difficult to determine how much to lift it up. If I were doing it again, I'd try cutting a slanted opening on the needle so the adhesive could be injected without lifting the entire unit up. But, they way I did it worked okay. 5. I worked my way around from hole to hole, injecting the adhesive. I got into a rhythm, and it got easier as I went on. Sometimes adhesive would come up through a different hole. On one spot, the adhesive came up between two floor planks. So, there was still a little mess. 6. I tapped in the wooden dowel, and used a knife to cut them off. I then tapped the part that was in the hole to get it below the surface. 7. I cleaned the area and got all of the adhesive off. That took a little time. 8. I waited about a day to see how it would work out. It was clear though that it was looking very good. 9. I danced around on the repaired area, very happy to have it work so well. 10. I rested my back and knees for the next day. I'm in my 70's so I was hurting a bit. :) This saved me a lot of money over alternative solutions. The product works really well. For my 2 foot by 5 foot area with about 10 spots to fill, the adhesive in the kit was enough, with very little left.
R**A
Worked well
I had some engineered wood floor installed in Feb. 2013. By Feb 2014 I had several areas that became unglued for whatever reason. I think my slab was not level in some areas. I bought this kit as it had great reviews. It worked very well and my hollow spots are now gone. I am 100% happy I no longer hear squeaky or loose boards. Since i had many bad spots to repair i had plenty of trial and error attempts to figure out the best way to apply this product. From my experience I would recommend the following. Have a wet towel handy to wipe up any glue that spills. 1. Wear an old shirt and plan to throw it away when you are done. 2. Identify all the bad areas and drill all holes before hand. 3. Put a light coat of lube on the rubber grommet at the end of the plunger that goes into the syringe. This will REALLY help push the glue out 4. Do not attempt to suck the glue up with the syringe. It will not work. 5. Remove syringe plunger, put your index finger on the tip of the needle and pour the glue in directly. 6. Do not install the plunger in the syringe yet. 7. Put the syringe needle in the drilled hole. It will not leak when you remove your finger from the needle. 8. Once the needle is in the hole put the plunger in and begin to push the glue out. 9. Repeat the steps for all holes. 10. I filled no more than 5 holes at a time then i inserted the wood dowel. This was by far the easiest way to apply the product with minimal mess. The wood dowels are larger than the drilled holes. I found the best way to install them was to use a pencil sharpener to lightly sharped the dowel so i could easily drive it in the hole. I used wire cutters to cut the dowel flush to the floor. Then i used the supplied metal tap to drive the wood dowel just a hair below the floor surface. My floor is dark so I used a black sharpie to color the wood dowel. It is very hard to see any repair was ever made. I would give this kit 4 stars and the only reason I would not give it 5 is because the syringe tip does not lock in place. It fell off on me a few times as I was applying the glue in the hole. Made a mess...hence have a wet towel handy. Buy an extra (better) syringe.
L**O
Don't hesitate!
Dont hesitate, just buy it. Plain and simple... this stuff really works! My flooring: Engineered bamboo hardwood. About 700sq ft. Pretty expensive flooring. Applied over concrete with underlayment. I had about 5 spots that were hollow below the surface and sagged down noticeably when walked on. On a brand new floor, that sucks! I took a lot of time prepping the floor and underlayment in hopes that I wouldnt have any sagging. No matter how much effort you put into prepping, it seems like there's always somewhere you'll have a problem afterwards. The problems with sagging were mostly noticeable when not wearing shoes, you can feel the boards moving in some areas. I hated this. I was ready to tear up the entire floor and glue it down. The problem is, we already had all the furniture and baseboards up. We really didn't notice the sagging / hollow spots until days later. So i googled a fix and DriTac popped up almost immediately and with great reviews. Now I see why. I hesitated because I didnt see how this stuff would work with the underlayment being in between the flooring and the concrete, thought surely it wouldn't work. But it does! DriTac procedure is very easy, a little messy, hardly any time involved. With one 32oz bottle, I was able to fix 2 of the 5 problem areas. The 2 areas were about 2'x2' in size. I hoped that it would have done more but it didnt. Either way, this is a LOT less expensive fix than tearing up the entire floor and gluing it down. Take my advise, if you have any doubts in this product, just try it, it works, period. EDIT: Thought I'd mention this b/c so many people complained about the application procedure... Pour the glue into a larger container so it's easier to siphon up. When siphoning up the glue, REMOVE the needle tip! It comes right off and easily goes back on. OR just pull the plunger out all the way and fill it through the top of the syringe, that's probably the easiest way. When you're done, just was everything out with warm water and soap immediately. Really simple.
J**O
doesn't "work" but it DOES....make a huge mess.
I highly doubt anyone who wrote a positive review of this nonsense actually got this to do what it advertised, but if they did, I guarantee it was out of dumb luck. why? bc it’s glue and glue shrinks when it dries which means it can’t possibly fill the the gaps under the floor. I did three rounds of this. I drilled FIFTEEN holes in my floor. I filled it until it was overflowing. not only did it not work but now, when I want to try to actually fix this issue, I now have a bunch of adhesive to clean up too. And even if I give up and decide NOT to fix it any further, this stuff still made such a mess on the surface of the floor that i'll be scraping and cleaning with a scouring pad from now until the day I die. On top of all that, it also says it's an all in one kit. It is not. You still need to go out and find the right wood putty. Not that that should matter if you take my very strong advice and do not buy this product because it will do far more damage than help.
D**R
FINALLY my floor pops are fixed
Our house was built 5 years ago and I had the flooring company out 4 times to fix pops in our engineered hardwood floor and they kept coming back. I figured I had nothing to lose (except 80 bucks!) by trying this product. I read the reviews with tips and there are some great suggestions. What worked for me was to mark the pops with painter's tape, cover that with a square of Glad Press N Seal and then drill through both layers. This eliminates a lot of the mess. The glue is really drippy but easily cleans up with a damp cloth. I couldn't get the hang of filling the hole with the dowel rod so I just filled the holes with a furniture repair wax crayon. The holes are so small that the wax works just fine. No more pops! Take your time and expect a little mess but you'll be happy with the results.
T**.
EXCELLENT Product
This is an excellent product because it works. It is messy, but worth it. My 20 year old engineered hardwood floors were popping and making a crackling noise when walked on. After reading the other reviews, and watching the company's video on "best practices", this is what worked for me: #1. Get some Frog tape and mark each spot that needs repaired. Put a mark in the center of the tape to mark where the hole will be drilled. Then outline that spot with additional pieces of Frog tape to make a larger square. #2. Drill the hole. #3. Get some paper towels and a damp rag. #4. Screw on the syringe metal tip. It does screw on and it stays in place. #5. Lubricate the rubber portion of the syringe plunger with Vaseline. Do this each time before filling the syringe with the glue. #6. While keeping a finger on the syringe tip, pour the glue in the syringe to about half. #6. Insert the plunger while keeping a finger on the syringe tip, because the glue is very runny. Insert the plunger just to the point where the syringe is sealed. #7. The syringe will have an air pocket in it. Turn it upside down while keeping the tip covered with a paper towel, because it will spit glue. While keeping the tip covered, push down to cause the plunger to expel the air. Stop when the plunger meets the glue. #8. Insert the syringe tip into the drilled hole. Bring the tip up just a hair so that it's not resting on the bottom. #9 Fill the hole. Have paper towels handy and the damp rag. Some holes take very little glue while others can take A LOT. Wipe up any excess and rinse out the rag under warm water for the next hole. #10 Trim the dowl rod tip per instructions, insert it and trim it, then remove the Frog tape.
L**R
Didn't like Applicator
The Glue is great and stops the popping but the application is another ballgame. The plunger wouldn't pull the glue up into syringe sometimes...had trouble with the needle stopping up with dust from drilled holes...Finally stopped and will invest in vet syringe as seen on some internet videos....however where I DID GET THE GLUE INTO THE HOLE IT WORKED GREAT!
Trustpilot
3 weeks ago
2 months ago