Desertcart purchases this item on your behalf and handles shipping, customs, and support to KSA.
🛞 Elevate your garage game — store smarter, not harder!
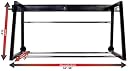
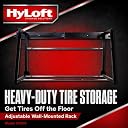
The HyLoft 01000 Heavy Duty Adjustable Garage Wall Multi-Tire Rack is a robust, all-steel storage solution designed to hold up to 400 lbs of tires. Its adjustable telescoping bars expand from 34 to 58 inches in width and depth, accommodating a wide range of tire sizes including seasonal, RV, ATV, and track tires. Finished with a scratch-resistant black powder coat, it mounts easily to wall studs on any garage wall, turning your space into a sleek, organized hub for tire storage.


| Additional Features | Expandable, Portable |
| Color | black |
| Finish Types | Unfinished |
| Item Dimensions D x W x H | 28"D x 58"W x 31.5"H |
| Item Weight | 22.27 kg |
| Material | Alloy Steel |
| Material Type | Alloy Steel |
| Number of Shelves | 1 |
| Product Dimensions | 28"D x 58"W x 31.5"H |
| Shelf Type | Adjustable Shelf |
| Special Feature | Expandable, Portable |
| Style Name | Hyloft |
D**N
Great for truck tires
Setup was easy, took a few tries to get the adjustment bars sizes correctly for my tires but they rest nicely now. I weighed these snow tires at ~70 lbs each before ordering. This would max out many other wall mount tire racks. Glad I ordered this one, feels totally solid and secure. There were some scratches on the finish but let's be honest... I'm not struttin' this rack around town, it's not in the elements inside my garage and it's used to rack my seasonal tires. Still 5 stars all the way. The bars they use are nice and hefty by the way. The welds and build quality are solid all around. The tires I have up there right now are 265 70 17 winter wheels and tires and my 275 65 18 all season should fit up there just the same. You can see that I mounted mine really high. To make it easier to get the 70 lb wheels and tires up that high I used a cheap block and tackle. Super-Handy Heavy-Duty 4,000 LB Capacity Rope Hoist -- it's a really cheap solution, the pulleys have more friction than I'd like... again, not the best but I do this twice a year. Just make sure you use a way over powered hook properly anchored to a beam on the ceiling. The one I'm using (from Home Depot) is rated for 375 lbs... not designed for overhead lifting but the job didn't stress the setup at all. In fact my 5 yo daughter was able to hoist it. Finally my wheels and tires are up and out of the way!! Thank you! ...looks cool too.
D**E
Great Tire Rack for the Money
TL;DR: Great rack for the money with some manipulation and different hardware. Drill 3/16" pilot holes. Do not use an impact to drive the bolts into your studs; you will risk shearing them. Use a ratchet/socket combo. Easy to assemble and install assuming you have the proper tools. To answer one of the biggest questions regarding tires hitting the wall: they do not. But I guess it also depends on your size tires. The wheel/tire combo I personally have on it are the factory 18" wheels from a 2018 Subaru WRX Limited with the OEM summer Dunlop 245/40R18 tires. As seen in one of my photos, there is approximately 1/2" rear wall clearance. As for the included hardware, I did not use their 3" lag bolts. I spent the extra money on 6 3/16"x4" stainless lag bolts with 12 matching washers which were approximately $20 at Lowes. I used 2 washers per bolt; 1 on the head of the bolt and 1 in between the rack and wall. These seem much more durable than the ones that came with the rack. Cheap piece of mind. As for overall quality, I'm sure there are better made racks out there for more money. The main 'gripe' I have with this rack is the inconsistency of the folding arms. When both are fully extended, the front of the rack is not 100% level. However, I can assure that the main supports that bolt to the wall are perfectly plumb and level relative to each other. I used a laser mounted level and a spirit level to confirm. The problem lies within one of the articulated arm bolt holes. The hole, either on the right or left arm, was drilled either a tad too high or too low - depending on which way you look at it. (The right side sags a tad too low or the left sits a bit too high.) To remedy this, I drilled out the right arm hole a bit larger to make room for adjustment and then re-tightened. I do not plan on folding this rack so I'm not concerned about the folding joints being tight. My OCD got the better part of me since I wasn't able to perfectly center the rack in between my garage windows because of stud location. But it worked out for the better since my garage door track would have gotten in the way anyway. Mine is mounted 78" from the floor to the bottom of the main arms to ensure adequate clearance of my big head. There is approximately 8" of clearance from the top of the tires to the ceiling.
J**O
Awesome tire rack. Do not mount over your head.
I bought this tire rack to keep a set of snow tires for my Nissan Titan off the garage floor. The packaging was beat up, but everything inside was undamaged and extraordinarily well-wrapped in foam. Seriously, I gave up unwinding the foam and hacked through it with a razor blade. If you are the kind of person who thinks "I'll just wing it" when you open a box of parts, as am I, then this may serve as a cautionary tale of thinking twice before drilling holes. Anyways, I carefully located three studs, drew a leveled line, and marked and drilled the appropriate holes. Then I brought the mounting bracket up and discovered that the holes in the bracket were not drilled along straight lines or vertical centers. So use the bracket pieces to determine your hole locations if you do not want extra holes in your studs. Also, the lag screws I received were a size larger than the ones referenced in the instructions. I don't remember exactly, but I think the instructions referenced 3/8" but the bolt heads were 7/16". So if you do not wish to precariously balance yourself on a ladder with a drill, an unwieldy piece of steel, and a lag bolt, only to discover you have to climb down again and get the right socket, might want to test fit on the ground. I finally got the brackets installed and level. I assembled the actual tire holder on the ground, and test fit the tires to get an idea of how wide it would need to be. Even on the ground, the rack looked a lot better than a pile of tires, and kept things well corralled. I realized that I could insert the entire assembled stand into the brackets, but it was a little unwieldy to get up the ladder and into the mounts. Once in the mounts, however, it was fairly sturdy and easy enough to adjust while empty. I had some concerns about the strength of the tire carrier, but this thing is pretty stout. It easily supported my 220 lbs of pure muscle as I did 12 one-armed chin-ups on the bar. Or, more accurately, it supported 220 lbs of wriggling, sweaty, middle-aged white man trying desperately to hold on to the bar until my feet came back into contact with the ladder. So it is pretty stout. The most important thing about installing the rack is to think things through. I loved the idea of using the space over my garage door to mount the rack, all the way until I had to carry my first truck tire up a ladder, and then try to leverage it into the rack while eight feet in the air. Then I realized that this was a very bad idea for me. When I change out my tires, I will probably relocate the mounting brackets to about chest height along a wall. Maybe shove the lawnmower under it or something. Final note of just random awesome: If you have a Nissan Titan with the Util-I-Track option, the bolt holes on the tire rack align with the bed rails, and you can secure the base to the base rails with a Cantruss or Unistrut 1" EMT pipe clamp, available at your local big-box store for about $1.98. Two spring nuts and two 8" hex bolts will have this thing anchored to the truck bed as though it were installed that way. Makes transporting tires marginally easier to secure, and clears up some bed space. I could have probably done the same thing with rolling them in upright and tie-strapping them down, but I had the rack and thought it was cool.
T**D
Great and simple wheel/tire rack for clearing up extra floor space
I'm a wheel whore. At one time had about 5 sets of wheels, now I'm a bit more tamed and down to 2 sets of wheels. Since I'm actually trying to use my garage for a off street parking instead of storage space I had to look for some way to store my stock set of wheels. After doing some searches for wall mounted wheel racks I originally was planning to build my own from plans I found online but after doing more research I found the Hyloft 01031 rack at a lower price then what it cost to buy raw materials but it was already put together for me and backed by the manufacturer. Installation was simple, followed directions as printed. I did however had to provide my own washers for each of the bolts and lag bolts total 10pcs. I'm sure the rack would work fine without the washer but the rack is hollow and do not have gussets. I just felt a little safer knowing the washers added surfaced area where it would contact the rails/bars. The cross bars holding the wheel/tires up is comprised of 2 bars, one smaller bar sliding into a larger bar for adjust ability. Per the instructions the rack can be in to different widths 32 inches and 48 inches. I check for studs behind my wall and found instructions were matched up to 48 inches. One of my fears was that the cross bars were too thin and possibly flimsy. They're actually quite thick but they do flex a bit due to the 2 bars not exact Inner and outer diameter dimensions. Again I felt the need for washers especially for the 2 bars holding up 300lbs. Another cool thing, I'm not sure if any one mentioned yet. There are 2 crossbars included, so if you install both bars at the correct distance for your wheels. The tires will come close to the wall but NOT touch the wall, saving you from cleaning your wall of dirt and dust. The first couple of nights after installation and loading my Audi A4 17 inch wheels with tires, I was really iffy on parking my car underneath, needless to say I didn't park my car under the rack. I'd come home from work wondering if the rack gave out or maybe needed a couple of days for the metal or weight to settle in any sag. I feel confident in the production's structural integrity and now park my car in the garage and underneath it. I only gave it 4 stars because I provided my own washers and this is not the best looking wheel rack but it does what the manufacture says. I'm going to buy another one.
T**B
Great low price rack.
I've now had this rack for 5+ years... doing just great!
M**S
Tire Storage Rack
This is an awesome product. Easy to install with a friend or alone
M**A
A good sturdy way to store tires or other things
I wanted to write a review for the questions that I had before I bought it and to help people out with their future purchase. First of all, the mounting hardware is fine. They seem to be 5/16 lag screws. I used washers with them but I don't know if that was necessary. You first find your wall studs, mine were 12 inches apart. Then you measure out 48 inches and mark your holes. Measuring from the ceiling, or a level floor would help you in making sure you are installing the brackets at the same height. Drill first with a 3/16 drill where you marked your hole. Then, while holding your bracket up, screw in the lag screw. The clip that holds the bottom of the bracket when not in use goes on the outside. I used a socket attachment on my drill to drive in the lag screw. You will know if you are screwing into a stud because you will feel the resistance. So get the first screw in the top hole on each bracket. Just get the screw kinda tight, where the head of the screw just touches the bracket. I went 8 inches down from my garage ceiling for the first hole and I am happy with that decision. Then take a level and make sure your brackets are straight up and down. Once you do that you can drill your other mounting holes and put your lag screws in with the bracket already up. Now that the brackets are up you can go back and tighten all the screws by hand with a socket wrench until you think that they aren't going to move. It is wood so don't use a breaker bar or impact gun or anything with a crazy amount of force to tighten these. I used my drill to get them in and a socket wrench to tighten them up. Next comes the bottom bars. Little one goes in the big one, then install the bolts to hold them, tighten. That part is really simple. The whole thing takes about 25 minutes if you have the tools and measure correctly. I am happy with this product. I have 4 wheels and tires on mine with room to spare. You could also store boxes, totes, or whatever on them. Good luck and make sure all your bolts are tight.
D**E
Awesome Product!
Bought this, as this is the same thing on TireRack.com for around $150 less. Had some skepticism, but it arrived on time in a small package. After opening up the box, I found the product to be incredibly sturdy and well built. After deciding on where to mount it, i started with one side and lag bolted it into the stud, checking for it to be level and the same thing with the other side. The one thing that I found out, that was quite convenient, is that the product description says up to 48" wide, well my studs were wider than 48" and was around 52" center to center of the studs in the garage. This thing goes about 4-5" max beyond the 48" that they claim. After installing the product on the wall and all the tubes to hold the tires/wheels that I had, I double checked it by literally hanging on it, off of the ground and it didn't budge. I then put up a pair of 17" rims w/o tires, (2) tires only, and a pair of 17" tires with rims on it and it fit snugly and held up. I then hung from it again off the ground, no movement whatsoever. This thing goes above and beyond what they claim, and if done right, can hold more than they claim as well. The bars sag slightly in the center due to how far the width is, but hasn't moved, budged or anything. I have had it up for a week now and nothing. Helped my friend install one in his garage who has had it the same width and weight on it for over a year now. His sags in the middle, but hasn't budged or moved. The one downside, is that the lag bolts aren't necessarily the best grade and so I went out and bought a better grade lag bolt to make sure it holds in the studs better. For sure will be buying a second one for the rest of the tires/wheels I have in the garage, great product for an un-beatable price!
Trustpilot
2 months ago
3 weeks ago